The Backyard Oasis Blueprint: Smart Gazebo Tips for a Garden You’ll Never Want to Leave
Disclosure : This post may contain affiliate links or paid partnerships. I may earn compensation if you click a link or make a purchase, at no additional cost to you. See my disclosure for more info.
What if your backyard actually felt like a place you wanted to be?
Not a chore. Not a maintenance obligation. Not just the rectangle of grass you mow every other weekend and otherwise ignore.
A real place. Comfortable. Inviting. The kind of outdoor space that pulls you outside after dinner even when you didn’t plan to go.
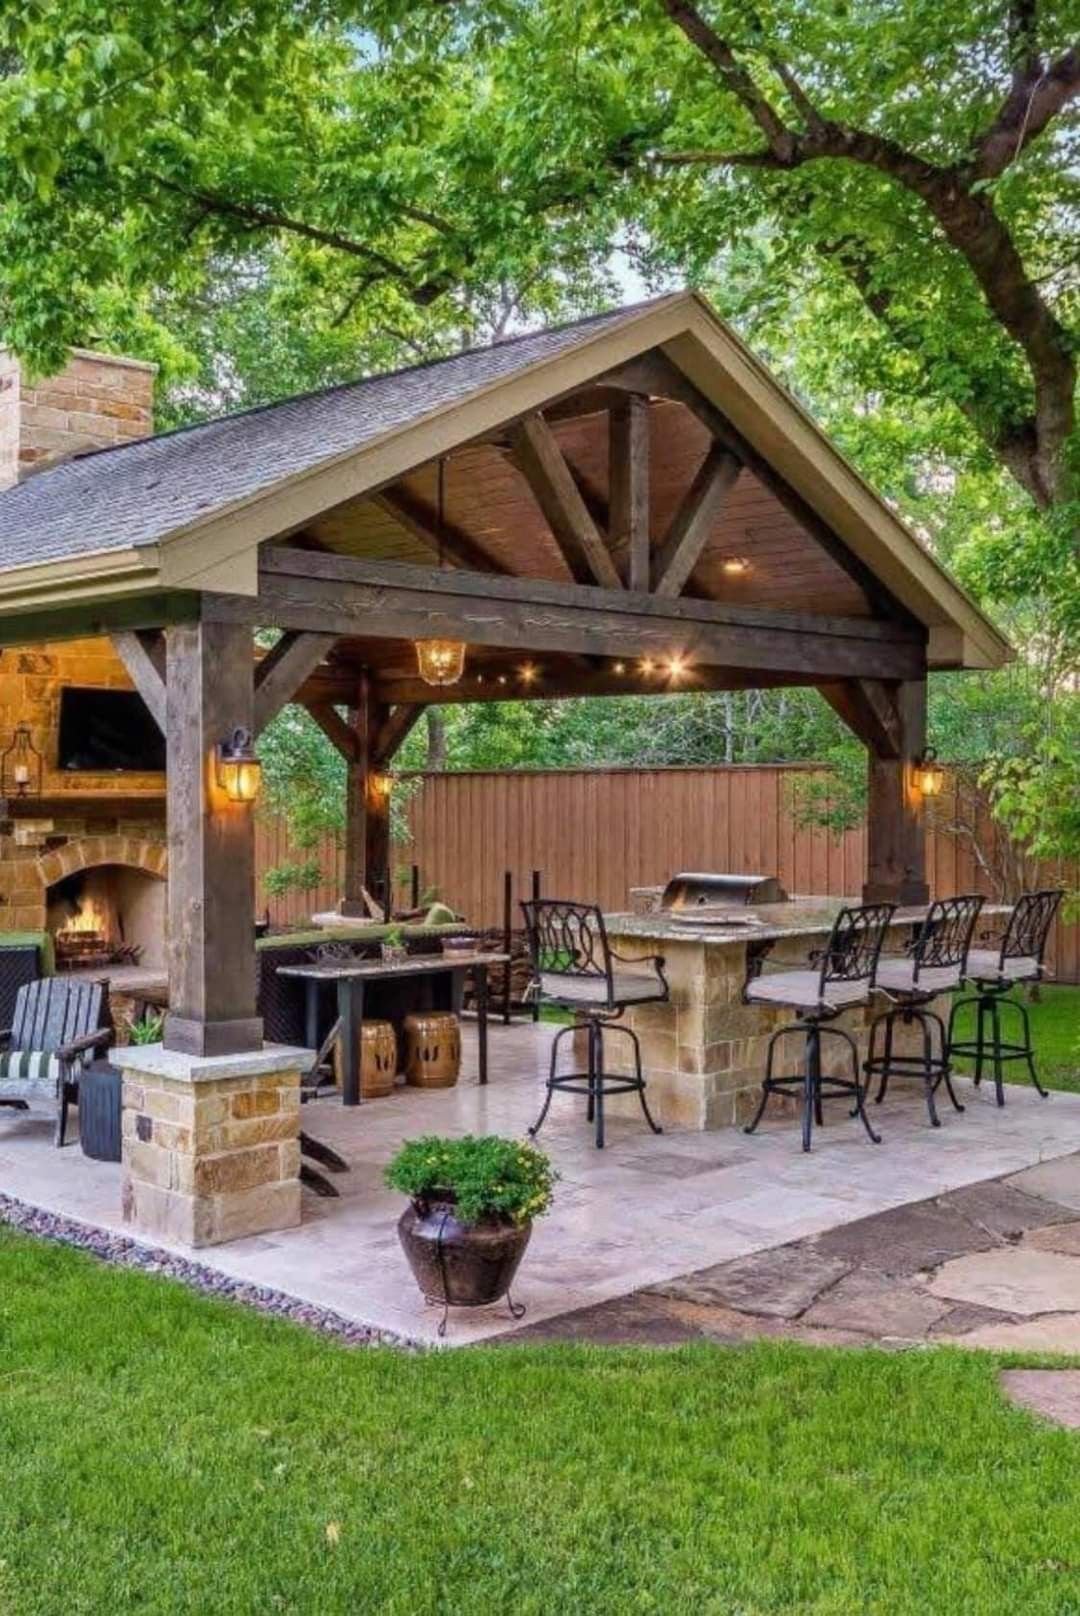
You’ve had a glimpse of what that could look like. The string lights. The gazebo with the curtains and the potted plants. The whole setup that looks effortless and feels lived-in.
It’s not as far away as it looks. A gazebo, set up properly, is the fastest and most effective transformation available to any backyard. Here’s the full blueprint.
The Root Cause of an Unused Backyard — And What a Gazebo Does to Fix It
Your indoor rooms work because they’re complete. Every element in them communicates function and invitation. The sofa says settle in. The lamp says stay as long as you like. The coffee table says put your things here.
An undesigned backyard says nothing. It’s open in a way that reads as directionless rather than free. The brain categorizes it as a “pass through” space and sends you back inside without making a conscious choice.
A gazebo introduces structure. A boundary. A destination. It tells your brain that this is a place to stop and inhabit.
But — and this is the critical part — only if you do more than set up the frame.
An empty gazebo is an empty room outdoors. Still nothing to do in it. Still no reason to stay.
The magic is in the ten steps that follow.
1. Match the Gazebo to Your Actual Yard Size
Scale is where gazebo projects go wrong most often and most dramatically.
Buy something too large for your yard and the structure consumes the entire space. Children and pets have nowhere to play. Sightlines disappear. The yard feels dark and compressed rather than enhanced.
Measure the yard. Map out everything that needs to stay in it. Then shop within those dimensions.
Smaller yard: a compact 8-foot canopy or lean pergola frame creates the outdoor room without crowding everything else out.
Average yard: a 10-to-12-foot hardtop gazebo hits the ideal proportions for most suburban gardens. Real space to live in without overwhelming the setting.
Larger yard: layer the spaces. A main gazebo anchoring the primary social area, secondary destinations — a hammock, a fire area — creating a garden with multiple draws.
Always check the style of your house before selecting materials. The gazebo should speak the same design language as the home it belongs to. When it does, everything looks intentional. When it doesn’t, nothing does.
2. Spend Time in Your Yard Before Deciding Where to Place It
The center of the lawn is almost always the wrong answer.
It’s the spot that seems obvious on paper and disappoints in practice — too much sun, too much wind, too far from the kitchen to feel convenient.
Do your homework before you commit to a location. Actually spend afternoons in different parts of your yard, in different weather, at different times of day. Learn how it actually works rather than how you imagine it works.
Three questions that guide good placement:
Where does natural shade fall in the hottest part of the afternoon? That’s where you’ll want to be in summer. Put the gazebo there.
How convenient is it to get there from the kitchen? The easier the access, the more often you’ll go. Convenience is underrated as a design principle.
What will you see when you’re sitting in it? Orient toward the best view in your garden. Away from the utility areas, fences, and eyesores.
Good placement amplifies everything else you do. Poor placement undermines it. This is the decision worth spending the most time on.
3. Give the Space a Proper Floor Before You Furnish It
Grass looks pleasant right up until the first significant rainfall. After that, it becomes mud, waterlogging, and a surface that deposits dirt on everything it touches.
A gazebo with a proper floor beneath it is a genuinely usable space in all weather. Without one, it’s a fair-weather installation that spends most of its time being avoided.
Pea gravel: put down weed-blocking landscape fabric first, then spread a two-to-three-inch layer of gravel. Fast to install, inexpensive, and drains immediately after rain. The texture and crunch underfoot are also aesthetically satisfying in their own right.
Pavers or flagstone: a more considered installation, but the result is impressive and permanent. Well-laid pavers need almost no attention for decades.
Composite decking: the premium finish. Warm, solid, maintenance-light, and it most clearly signals that this is an outdoor room — a real extension of the interior living space.
Before any surface goes in: level the ground completely. This one step determines whether your floor stays stable, drains correctly, and supports furniture without wobble or sink.
4. Layer Your Gazebo Lighting for Maximum Evening Impact
Lighting is where outdoor spaces make or break their atmosphere — and most of them break it by relying on a single flat source.
The approach that creates something genuinely beautiful is layering three distinct types of light at different heights and intensities. This is what gives outdoor spaces that warm, dimensioned, magazine-quality glow.
Ambient light: warm white string lights strung across the gazebo overhead. This is the layer that sets the mood and determines whether the space feels like a sanctuary or a waiting room. Warm white only — it replicates golden hour and it’s the only outdoor bulb color worth using.
Task light: a table lantern or battery-powered lamp providing enough focused illumination to read and eat comfortably once the sun is gone.
Accent light: Solar stake lights around the perimeter or low LED strips along the structure base. This makes the gazebo glow at night from every angle and signals to the rest of the garden that this is a destination.
All three layers are available in solar form. Set them up once. They charge through the day and run automatically at dusk. Completely effortless from that point on.
5. Add Screening for Privacy — Because Relaxation Requires It
An exposed space is one where you perform rather than relax.
Being visible keeps the nervous system partially engaged in monitoring your social environment. The deep quiet that characterizes genuine rest doesn’t come. You’re in a nice place but you’re not fully there.
A small amount of screening changes everything. Your body settles. Your mind follows.
Weatherproof curtain panels hung from the posts are the easiest and most adjustable solution. Closed when you want seclusion, open when you want air and views. Installation is quick and the visual transformation is immediate.
A planted trellis with a fragrant climbing plant — jasmine, sweet-scented clematis, or wisteria — creates natural screening that becomes lusher and more beautiful with every season.
Tall ornamental grasses or bamboo in large planters offer immediate height and can be repositioned as your needs change.
Leave at least one side fully open to the garden. Enclosed enough to feel protected. Open enough to feel alive.
6. Furnish It with Intention — You’re Designing a Room, Not Storing Chairs
The difference between a gazebo people visit and one people live in comes down almost entirely to furnishing.
Minimal, uncomfortable, or thoughtless furniture means the space gets used for ten minutes before everyone drifts back inside. Good furniture means people stay for hours without realizing how long it’s been.
Begin with seating worth staying in: deep-cushioned outdoor lounge chairs or a properly upholstered outdoor loveseat with cushions that hold their comfort over time. The test: would you choose to stay in this seat for two hours? If not, it’s the wrong seat.
Add a table of some kind. Coffee table, side table — anything. A surface to put things on is basic ergonomic necessity for comfortable outdoor living.
Layer in the finishing elements: outdoor throw pillows, a light throw for cooler evenings, and an outdoor rug underfoot to define the space and complete the composition.
These additions are modest in cost and major in impact.
7. Plant Around and Inside the Gazebo to Integrate It with the Garden
A structure without plants looks just like that: a structure. Functional but disconnected from the garden around it.
Plants are the element that dissolves that disconnection. They link the hard elements — wood, metal, composite — to the soft, living landscape and make the entire composition feel as though it was planned as one thing from the beginning.
At the base of the posts: low-growing plants that soften the transition between structure and ground. Lavender is the perennial recommendation — compact, fragrant, heat-tolerant, and beautiful in every season.
Around the outer perimeter: mid-height shrubs or grasses that frame the structure visually and give the impression it has been here for years and the garden grew up around it.
Inside and above: trailing greenery in hanging baskets from the rafters, specimen plants in large decorative pots at floor level, a tabletop herb planter for everyday use.
Low to high. Layer by layer. The depth creates a sense of lushness that no amount of furniture or lighting can replicate.
8. Engage Every Sense — Not Just Sight
Outdoor spaces that only look good are spaces you admire and then leave. Ones that feel good are spaces you stay in.
The difference is always sensory depth. Designing beyond the visual to include sound, scent, and touch is what separates a well-photographed backyard from a genuine retreat.
Sound: a compact solar water feature placed near the seating creates a constant, gentle auditory backdrop that reduces stress perception and masks street and neighbor noise. The effect on the body is quick and measurable.
Add deep-toned wind chimes for movement and musical texture in the soundscape.
Scent: fragrant herbs in pots within reach of the seating. Rosemary, mint, lemon verbena. A breeze turns into aromatherapy. A citronella candle provides scented candlelight that also deters insects.
Touch: vary your materials deliberately. Smooth teak, rough rattan, soft upholstery, cool stone. Textural variety is one of those things that operates below conscious attention and contributes substantially to the feeling of quality and completeness.
When all four senses are addressed, the space stops being a garden feature. It becomes an experience that restores you.
9. Weatherproof It Before Weather Has a Chance to Cause Damage
The least glamorous step. The one most people skip, at least partially. And the one that saves the most money over time.
Outdoor elements exposed to weather degrade on a consistent schedule unless protected. Cushion mold, wood rot, metal rust, and fabric deterioration aren’t accidents — they’re the natural result of insufficient protection.
Prevention requires very little time or money. Repair and replacement costs multiples more of both.
Cushions: water-resistant covers or quick-dry foam inserts. A weatherproof deck storage box that takes two minutes to fill before a storm. That’s the entire investment.
Wood: sealed or stained every one to two years with a quality exterior product. Prevents moisture ingress and UV fading. A morning’s work per season.
Metal: annual rust inspection every spring. Small spots caught early addressed with rust-inhibiting spray paint. Ignored spots become structural issues.
Fabric panels and canopy covers: removed and stored dry before winter and major storms. The lifespan difference between stored and left-in-place fabric is measured in years.
Maintain it properly from the start and you won’t be replacing it.
10. Anchor It Completely So the Wind Can’t Undo Your Work
The tip that matters most for safety and peace of mind.
Wind is powerful, unpredictable, and it doesn’t know what you paid for your gazebo. An unanchored canopy structure in a strong wind becomes a large, heavy, fast-moving problem. Every year, homeowners deal with the consequences of having skipped or deferred proper anchoring.
It’s completely preventable.
Soft-top and canopy gazebos: heavy-duty ground anchors on every post, sandbag weights on all four corners, tie-down ropes in consistently windy areas. The stakes that came with the product are not engineered for real wind events.
Hardtop and permanent wooden structures: anchored into concrete — either a purpose-poured slab, individual footings, or bolted to an existing deck surface. This is non-negotiable. No workarounds, no temporary solutions.
Anchor it properly on day one and you never need to think about it again. Sit through any storm. Enjoy every evening. That’s what an oasis is supposed to feel like.
Start Small. Start Today.
You now have a complete blueprint. Ten steps. All practical. All achievable without professional help or an unlimited budget.
The only thing that stands between the backyard you have and the one described here is starting.
Don’t try to do everything at once. Choose the single most immediate, most impactful thing for your situation right now.
Hang the string lights. Lay the outdoor rug. Move the gazebo into the afternoon shade. Plant lavender at the corner post.
One action becomes momentum. Momentum becomes a space worth being in.
And one evening, sooner than you think, you’ll realize you’ve stopped going inside when the sun goes down.
Because out here is better.
Go build it.
🔍 Yoast SEO Checklist
🔍 Focus Keyphrase: gazebo garden oasis
📌 SEO Title (< 60 chars): How to Create a Cozy Garden Oasis with Gazebo Tips
🔗 Slug (< 60 chars): cozy-garden-oasis-gazebo-tips
📝 Meta Description (< 155 chars): Transform your backyard into a cozy garden oasis with these expert gazebo tips on placement, lighting, privacy, and more. Start building your retreat today!